MXNet made simple: Image RecordIO with im2rec and Data Loading
- 18 minsIn this post, we will learn the mechanisms for packaging any image dataset. We will also detail how to load it while applying data augmentation with MXNet. Preparing the data for your neural network is often time consuming and error prone. This tutorial aims at providing some guideline for doing it with MXNet.
Oxford-IIIT Dataset
We will use the Oxford-IIIT Dataset to demonstrate how to perform data preparation and data loading.
From the Oxford-IIIT Dataset website:
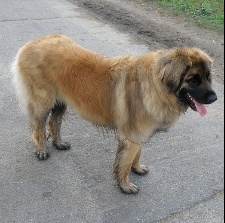
A 37 category pet dataset with roughly 200 images for each class. The images have a large variation in scale, pose and lighting. Can also be used for localization.
Below are some pet classes from this dataset
AbyssinianPersianamerican_bulldogamerican_pit_bull_terrierEgyptian_Mauenglish_cocker_spaniebasset_houndenglish_settergerman_shorthairedgreat_pyreneeshavanesejapanese_chinkeeshondleonbergerMaine_Coon- …
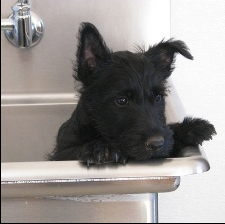
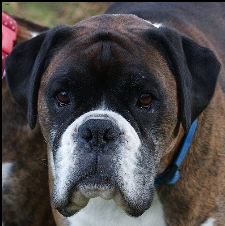
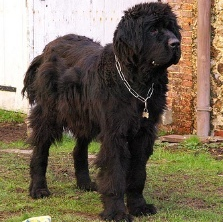
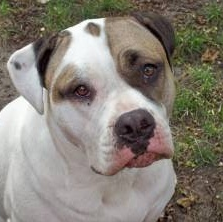
I am not a pet expert and it is always a good idea to look at the dataset to get a feel for the computer vision task ahead. Let’s take a look at some dogs and cats!
| English Cocker Spaniel | Russian Blue | Pug |
|---|---|---|
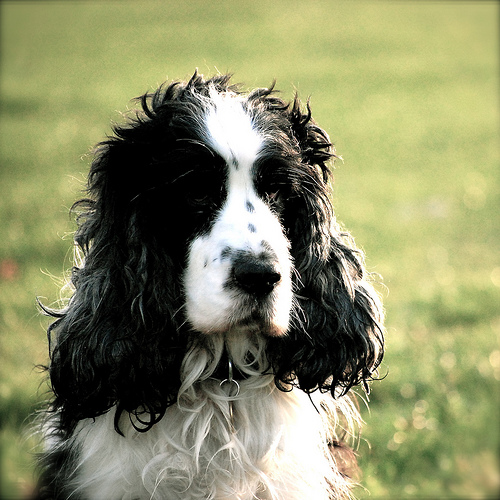 | 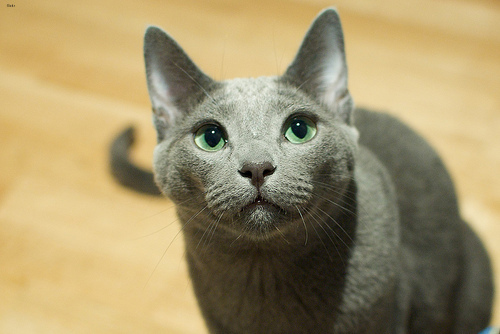 | 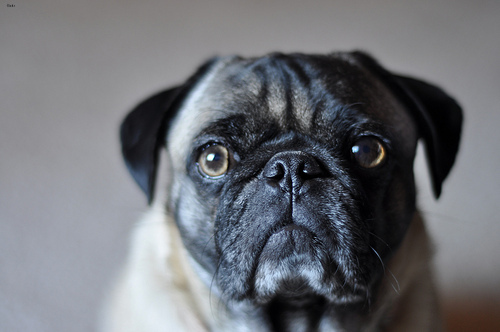 |
Downloading the dataset
I wrote a small bash script to fetch the dataset and organize it in a way that im2rec can easily use to create the image record files.
$ tree -d -L 1
.
├── Abyssinian
  ...
  ├── Abyssinian_100.jpg
  ├── Abyssinian_101.jpg
  ├── Abyssinian_102.jpg
  ├── Abyssinian_103.jpg
  ├── Abyssinian_104.jpg
  ...
├── american_bulldog
├── american_pit_bull_terrier
├── basset_hound
├── beagle
├── Bengal
├── Birman
├── Bombay
├── boxer
├── British_Shorthair
├── chihuahua
├── Egyptian_Mau
├── english_cocker_spaniel
├── english_setter
├── staffordshire_bull_terrier
...
├── wheaten_terrier
└── yorkshire_terrier

37 directories
Here is the bash script used to download the dataset
#!/bin/bash

set -evx


PROJECT_ROOT=$(cd "$(dirname $0)/../.."; pwd)

data_path=$PROJECT_ROOT/data/

if [ ! -d "$data_path" ]; then
    mkdir -p "$data_path"
fi


if [ ! -f "$data_path/saint_bernard/saint_bernard_33.jpg" ]; then

pushd $data_path

# Downloading the dataset
wget https://s3.amazonaws.com/fast-ai-imageclas/oxford-iiit-pet.tgz
tar zxvf oxford-iiit-pet.tgz
rm oxford-iiit-pet.tgz
mv oxford-iiit-pet/images/* .
rm -rf oxford-iiit-pet
rm *.mat

# Organizing images into folders
for image in *jpg ; do
  label=`echo $image | awk -F_ '{gsub($NF,"");sub(".$", "");print}'`
  mkdir -p $label
  mv $image $label/$image
done

popd

fi
Data Preparation with im2rec
MXNet provides a python script named im2rec to package an image dataset to achieve the following:
- Minimize the number of files
- Do the packing only once
- Pack in parallel
- Provide Random Access guarantee to the data - crucial for distributed Machine Learning
You can read a much more detailed explanation from the MXNet website.
man im2rec
As a reference, here is the man page for im2rec
$ MXNET_HOME/tools/im2rec.py --help
usage: im2rec.py [-h] [--list] [--exts EXTS [EXTS ...]] [--chunks CHUNKS]
                 [--train-ratio TRAIN_RATIO] [--test-ratio TEST_RATIO]
                 [--recursive] [--no-shuffle] [--pass-through]
                 [--resize RESIZE] [--center-crop] [--quality QUALITY]
                 [--num-thread NUM_THREAD] [--color {-1,0,1}]
                 [--encoding {.jpg,.png}] [--pack-label]
                 prefix root

Create an image list or make a record database by reading from an image list

positional arguments:
  prefix                prefix of input/output lst and rec files.
  root                  path to folder containing images.

optional arguments:
  -h, --help            show this help message and exit

Options for creating image lists:
  --list                If this is set im2rec will create image list(s) by
                        traversing root folder and output to <prefix>.lst.
                        Otherwise im2rec will read <prefix>.lst and create a
                        database at <prefix>.rec (default: False)
  --exts EXTS [EXTS ...]
                        list of acceptable image extensions. (default:
                        ['.jpeg', '.jpg', '.png'])
  --chunks CHUNKS       number of chunks. (default: 1)
  --train-ratio TRAIN_RATIO
                        Ratio of images to use for training. (default: 1.0)
  --test-ratio TEST_RATIO
                        Ratio of images to use for testing. (default: 0)
  --recursive           If true recursively walk through subdirs and assign an
                        unique label to images in each folder. Otherwise only
                        include images in the root folder and give them label
                        0. (default: False)
  --no-shuffle          If this is passed, im2rec will not randomize the image
                        order in <prefix>.lst (default: True)

Options for creating database:
  --pass-through        whether to skip transformation and save image as is
                        (default: False)
  --resize RESIZE       resize the shorter edge of image to the newsize,
                        original images will be packed by default. (default:
                        0)
  --center-crop         specify whether to crop the center image to make it
                        rectangular. (default: False)
  --quality QUALITY     JPEG quality for encoding, 1-100; or PNG compression
                        for encoding, 1-9 (default: 95)
  --num-thread NUM_THREAD
                        number of thread to use for encoding. order of images
                        will be different from the input list if >1. the input
                        list will be modified to match the resulting order.
                        (default: 1)
  --color {-1,0,1}      specify the color mode of the loaded image. 1: Loads a
                        color image. Any transparency of image will be
                        neglected. It is the default flag. 0: Loads image in
                        grayscale mode. -1:Loads image as such including alpha
                        channel. (default: 1)
  --encoding {.jpg,.png}
                        specify the encoding of the images. (default: .jpg)
  --pack-label          Whether to also pack multi dimensional label in the
Running im2rec
You need to have im2rec on your machine for it to work. The simplest way is to git clone the MXNet repository.
$ git clone https://github.com/apache/incubator-mxnet.git
OpenCV is also required by im2rec. I usually create a python virtualenv in which I install all the dependencies.
$ mkvirtualenv clojure-mxnet -p python3
$ workon mxnet
$ pip install opencv-python mxnet
One can also leverage anaconda
$ conda create -n clojure-mxnet mxnet opencv python=3
im2rec is used to first create a .lst file that will then be used to package the data in a binary format. The .lst file follows this format:
integer_image_index \t label_index \t path_to_image
Here is the part of the bash script that is used to generate the .lst files. It will generate a data_train.lst and a data_val.lst because the --train-ratio parameter is used.
python $MXNET_HOME/tools/im2rec.py \
  --list \
  --train-ratio 0.8 \
  --recursive \
  $data_path/data $data_path
It also generates a .idx file that is a mapping from integer_image_index to image_index.
Below is an example of the .lst and the .idx files that got generated
$ head -n 5 data_train.lst
5997    30.000000       saint_bernard/saint_bernard_101.jpg
5373    26.000000       miniature_pinscher/miniature_pinscher_80.jpg
120     0.000000        Abyssinian/Abyssinian_224.jpg
5176    25.000000       leonberger/leonberger_83.jpg
7185    36.000000       yorkshire_terrier/yorkshire_terrier_10.jpg

$ head -n 5 data_train.idx
5997    0
5373    35336
120     63300
5176    79460
7185    116656
Once the lst file is generated, im2rec is used to pack the dataset into binary files called image records.
python $MXNET_HOME/tools/im2rec.py \
  --resize 224 \
  --center-crop \
  --num-thread 4 \
  $data_path/data $data_path
It will generate the following files
$ ls | grep data
data_train.idx
data_train.lst
data_train.rec
data_val.idx
data_val.lst
data_val.rec
This is the bash script I used to generate the above files. I had to filter out some images that OpenCV could not parse for some reason.
# Making .lst and .rec files for MXNet to load
if [ ! -f "$data_path/data_train2.lst" ]; then

  # Cleaning up the images that are failing with OpenCV
  rm -f $data_path/Abyssinian/Abyssinian_34.jpg
  rm -f $data_path/Egyptian_Mau/Egyptian_Mau_139.jpg
  rm -f $data_path/Egyptian_Mau/Egyptian_Mau_145.jpg
  rm -f $data_path/Egyptian_Mau/Egyptian_Mau_167.jpg
  rm -f $data_path/Egyptian_Mau/Egyptian_Mau_177.jpg
  rm -f $data_path/Egyptian_Mau/Egyptian_Mau_191.jpg

  python $MXNET_HOME/tools/im2rec.py \
    --list \
    --train-ratio 0.8 \
    --recursive \
    $data_path/data $data_path

  python $MXNET_HOME/tools/im2rec.py \
    --resize 224 \
    --center-crop \
    --num-thread 4 \
    $data_path/data $data_path

fi
Data Loading with MXNet
The MXNet data loading was designed to follow these heuristics:
- Read continuously
- Reduce the bytes to be loaded
- Load and train in different threads
- Save RAM
Again, you can read a much more detailed explanation here.
Let’s go back to our Clojure REPL and load the image record with MXNet. First, we will need to load some dependencies.
(require '[org.apache.clojure-mxnet.io :as mx-io])
(require '[org.apache.clojure-mxnet.ndarray :as ndarray])
(require '[opencv4.mxnet :as mx-cv])
(require '[opencv4.core :as cv])
(require '[opencv4.utils :as cvu])
Now we can use the ImageRecordIter to load the .rec file we created with im2rec.
;; Parameters
(def batch-size 10)
(def data-shape [3 224 224])
(def train-rec "data/data_train.rec")

(def train-iter
  (mx-io/image-record-iter
    {:path-imgrec train-rec
     :data-name "data"
     :label-name "softmax_label"
     :batch-size batch-size
     :data-shape data-shape}))
The data is now loaded in RAM, ready to be used for training!
Data Augmentation
The ImageRecordIter API is powerful and lets you perform data augmentation very easily. The following common operations can be done:
- shuffling: the dataset is shuffled randomly
- angle rotation: rotate the image by a random degree
din[-d, d] - random cropping: randomly crop the image
- mirroring: randomly mirror the image
- shearing: randomly shear the image
| Original | Mirror | Crop | Rotate | Shear |
|---|---|---|---|---|
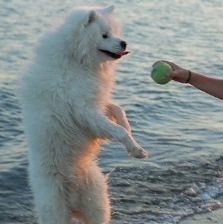 | 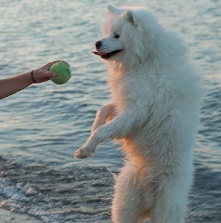 | 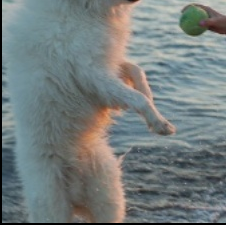 |  |  |
(def train-iter
  (mx-io/image-record-iter
    {:path-imgrec train-rec
     :data-name "data"
     :label-name "softmax_label"
     :batch-size batch-size
     :data-shape data-shape

     ;; Data Augmentation
     ; :shuffle true  ;; Whether to shuffle data randomly or not
     ; :max-rotate-angle 50  ;; Rotate by a random degree in [-50 50]
     ; :resize 300  ;; resize the shorter edge before cropping
     ; :rand-crop true  ;; randomely crop the image
     ; :rand-mirror true  ;; randomely mirror the image
     ; :max-shear-ratio 0.5 ;; randomely shear the image
     }))
There are many other data augmentation operations that are listed in the ImageRecordIter documentation.
Visualizing an ImageRecordIter
By leveraging OpenCV we can visualize the generated ImageRecordIter
(defn visualize-image-rec-iter!
  ([image-rec-iter]
   (visualize-image-rec-iter! image-rec-iter 5))
  ([image-rec-iter k]
   (let [nda-data (first (mx-io/iter-data train-iter))
         mats (map (fn [i]
                     (-> nda-data
                         ;; ith image in batch
                         (ndarray/slice i)
                         (ndarray/reshape data-shape)
                         ;; Swapping [c w h] -> [w h c]
                         (ndarray/swap-axis 0 2)
                         (ndarray/swap-axis 0 1)
                         (mx-cv/ndarray-to-mat)
                         ;; Conversion BGR -> RGB
                         (cv/cvt-color! cv/COLOR_BGR2RGB)))
                   (range k))]
     (doseq [mat mats]
       (cvu/imshow mat)))
   (mx-io/reset image-rec-iter)))
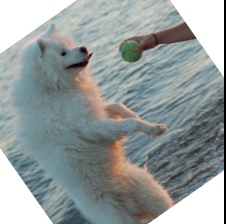
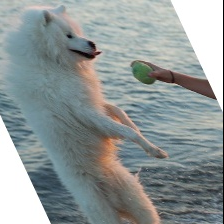
We need to reset the ImageRecordIter to prevent consuming the iterator when calling the function multiple times. Now, to visualize 5 images of the ImageRecordIter, we just need to call the function.
(visualize-image-rec-iter! train-iter 5)
| Image 1 | Image 2 | Image 3 | Image 4 | Image 5 |
|---|---|---|---|---|
 |  |  |  |  |
Conclusion
Now you can create your own image records from your favorite datasets and feed them to an MXNet module to perform some computer vision tasks. Getting the data into the right format is one of the most consuming parts of the job. Hopefully, this post has demonstrated how easy it is to do it with MXNet.
References and Resources
- im2rec python script
- Designing Efficient Data Loaders for Deep Learning
- Oxford-IIIT Pet Dataset
- MXNet IO API documentation
- MXNet made simple: Module API
- MXNet website
Here is also the code used in this post - also available in this repository
#!/bin/bash

set -evx


PROJECT_ROOT=$(cd "$(dirname $0)/../.."; pwd)

data_path=$PROJECT_ROOT/data/

if [ ! -d "$data_path" ]; then
    mkdir -p "$data_path"
fi


if [ ! -f "$data_path/saint_bernard/saint_bernard_33.jpg" ]; then

pushd $data_path

# Downloading the dataset
wget https://s3.amazonaws.com/fast-ai-imageclas/oxford-iiit-pet.tgz
tar zxvf oxford-iiit-pet.tgz
rm oxford-iiit-pet.tgz
mv oxford-iiit-pet/images/* .
rm -rf oxford-iiit-pet
rm *.mat

# Organizing images into folders
for image in *jpg ; do
  label=`echo $image | awk -F_ '{gsub($NF,"");sub(".$", "");print}'`
  mkdir -p $label
  mv $image $label/$image
done

popd

fi


# Making .lst and .rec files for MXNet to load
if [ ! -f "$data_path/data_train2.lst" ]; then

# Cleaning up the images that are failing with OpenCV
rm -f $data_path/Abyssinian/Abyssinian_34.jpg
rm -f $data_path/Egyptian_Mau/Egyptian_Mau_139.jpg
rm -f $data_path/Egyptian_Mau/Egyptian_Mau_145.jpg
rm -f $data_path/Egyptian_Mau/Egyptian_Mau_167.jpg
rm -f $data_path/Egyptian_Mau/Egyptian_Mau_177.jpg
rm -f $data_path/Egyptian_Mau/Egyptian_Mau_191.jpg

python $MXNET_HOME/tools/im2rec.py \
  --list \
  --train-ratio 0.8 \
  --recursive \
  $data_path/data $data_path

python $MXNET_HOME/tools/im2rec.py \
  --resize 224 \
  --center-crop \
  --num-thread 4 \
  $data_path/data $data_path

fi
(ns mxnet-clj-tutorials.image-record-iter
  "Tutorial for ImageRecordIter API."
  (:require [org.apache.clojure-mxnet.io :as mx-io]
            [org.apache.clojure-mxnet.ndarray :as ndarray]
            [opencv4.mxnet :as mx-cv]
            [opencv4.core :as cv]
            [opencv4.utils :as cvu]))

;; Parameters
(def batch-size 10)
(def data-shape [3 224 224])
(def train-rec "data/data_train.rec")

(def train-iter
  (mx-io/image-record-iter
    {:path-imgrec train-rec
     :data-name "data"
     :label-name "softmax_label"
     :batch-size batch-size
     :data-shape data-shape

     ;; Data Augmentation
     ; :shuffle true  ;; Whether to shuffle data randomly or not
     ; :max-rotate-angle 50  ;; Rotate by a random degree in [-50 50]
     ; :saturation 0.5
     ; :resize 300  ;; resize the shorter edge before cropping
     ; :rand-crop true  ;; randomely crop the image
     ; :rand-mirror true  ;; randomely mirror the image
     ; :max-shear-ratio 0.5 ;; randomely shear the image
     }))

(defn visualize-image-rec-iter!
  ([image-rec-iter]
   (visualize-image-rec-iter! image-rec-iter 5))
  ([image-rec-iter k]
   (let [nda-data (first (mx-io/iter-data train-iter))
         mats (map (fn [i]
                     (-> nda-data
                         ;; ith image in batch
                         (ndarray/slice i)
                         (ndarray/reshape data-shape)
                         ;; Swapping [c w h] -> [w h c]
                         (ndarray/swap-axis 0 2)
                         (ndarray/swap-axis 0 1)
                         (mx-cv/ndarray-to-mat)
                         ;; Conversion BGR -> RGB
                         (cv/cvt-color! cv/COLOR_BGR2RGB)))
                   (range k))]
     (doseq [mat mats]
       (cvu/imshow mat)))
   (mx-io/reset image-rec-iter)))

(comment

  (visualize-image-rec-iter! train-iter 8))

Arthur Caillau
A man who eats parentheses for breakfast